
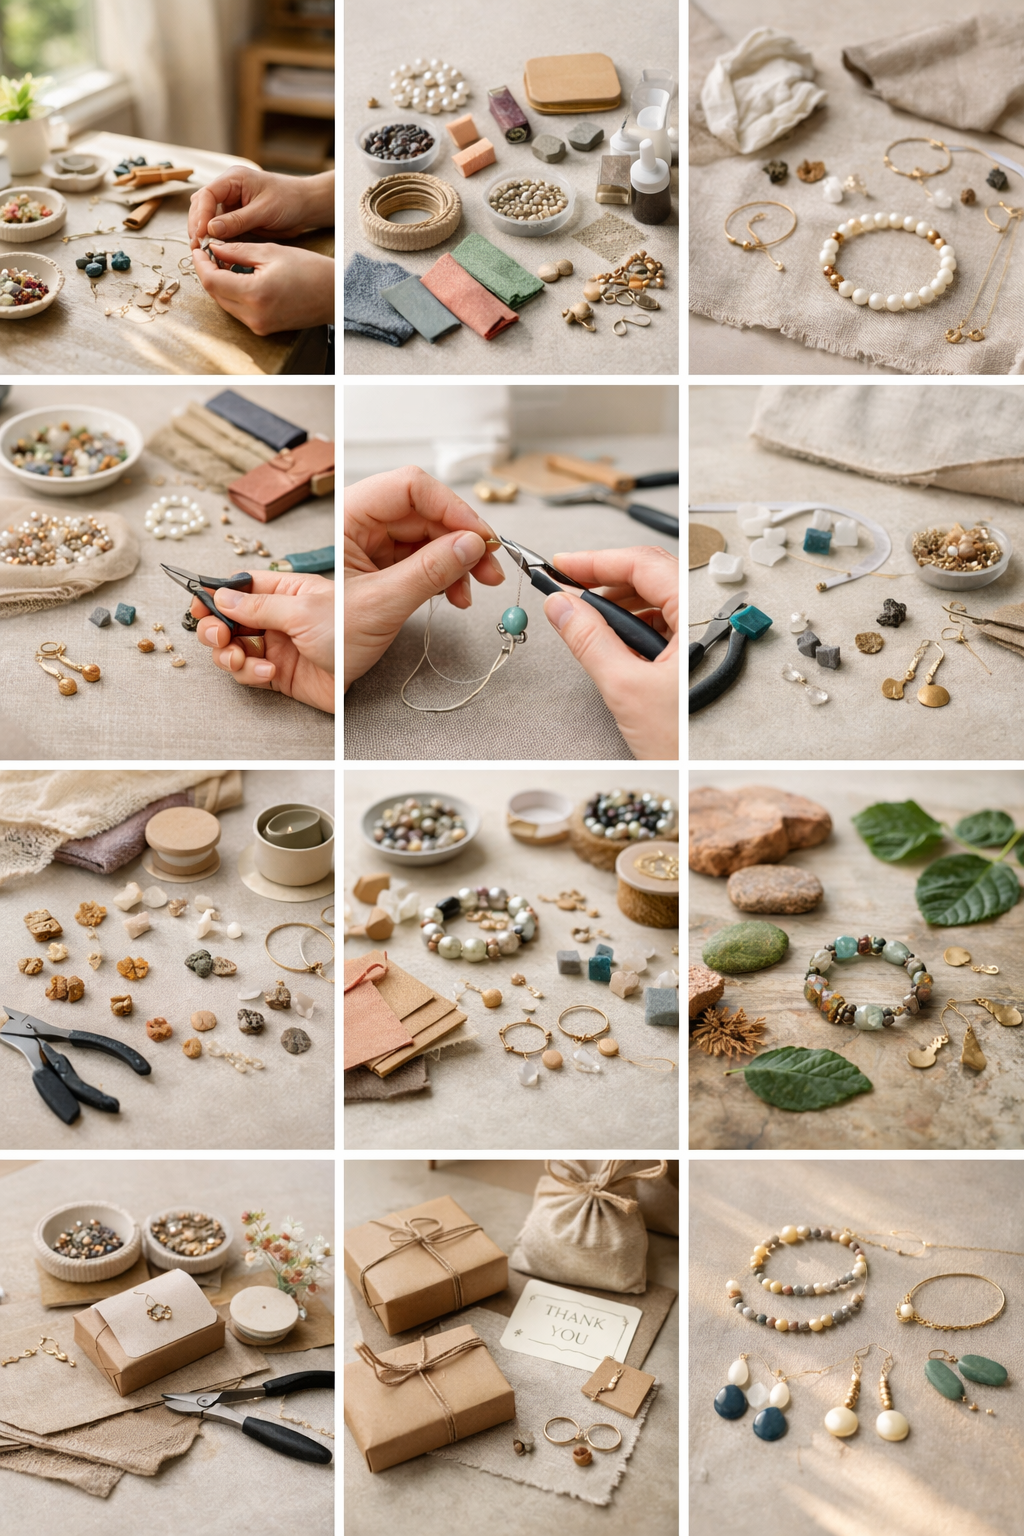
Getting Started with Jewelry Making as a Beginner
Making your own jewelry is rewarding, enjoyable, and very well-suited for the total beginner. You get to experiment with colors, textures, and designs to make personalized pieces. The focus on beads and wire, as you said, is a good starting point because these materials are so budget-friendly, versatile, and forgiving for beginners. With wire wrapping and beading techniques, you can make various items, from bracelets to necklaces or earrings, without requiring advanced skills or expensive equipment. The key is to start simple, practice patience, and enjoy the process-sketching your ideas beforehand can help you visualize and cut down on errors, making it feel natural over time.
The following is a general, comprehensive step-by-step approach based on popular beginner guides. Since this will be a simple beaded bracelet using beads and wire, it’s accessible and builds foundational skills. You can adapt this for other pieces like earrings or a necklace.
Essential Tools and Materials
Before starting, you’ll need these basics. The following is a list of what you’ll need. These are recommended in a variety of resources for beginners because of their price and simplicity.
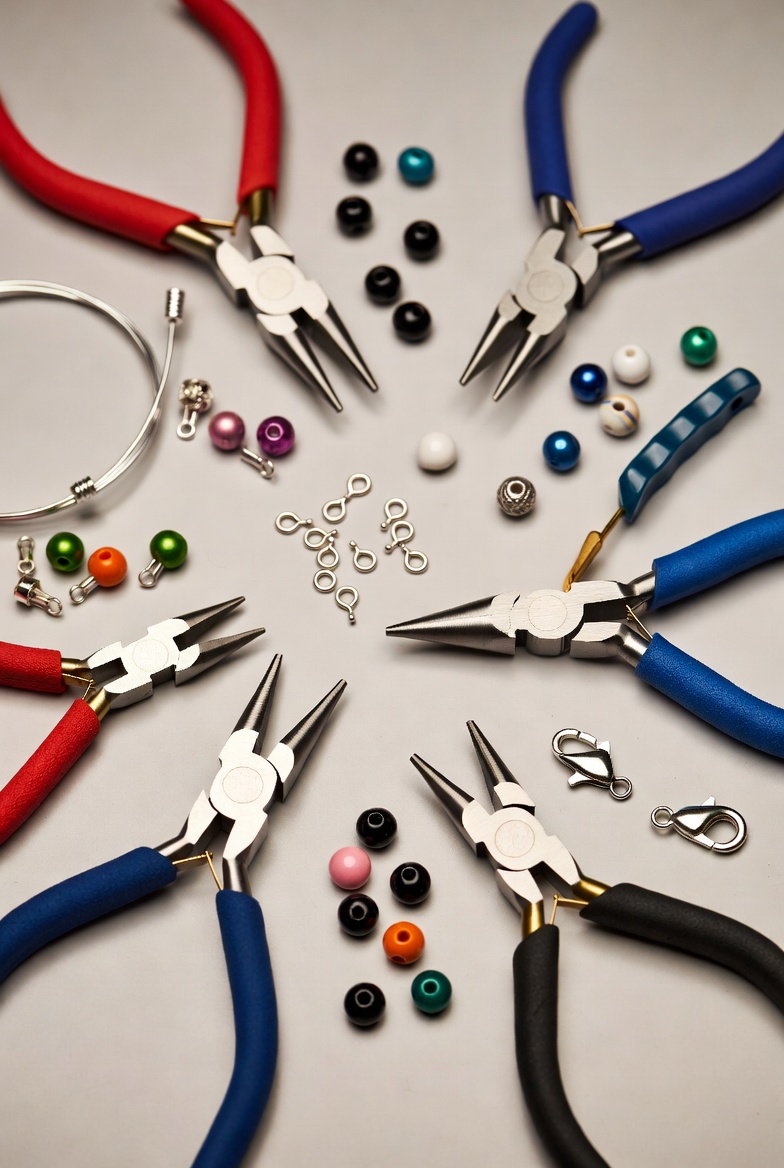
*Tools (Must-Haves for Beginners)
1- Needle-nose pliers: Used for gripping and bending wires.
2- Round Nose Pliers: used for creating loops and curves.
3- Wire Cutters: These are used for cutting wires in a clean
4- Crimp pliers (optional but useful for securing beads).
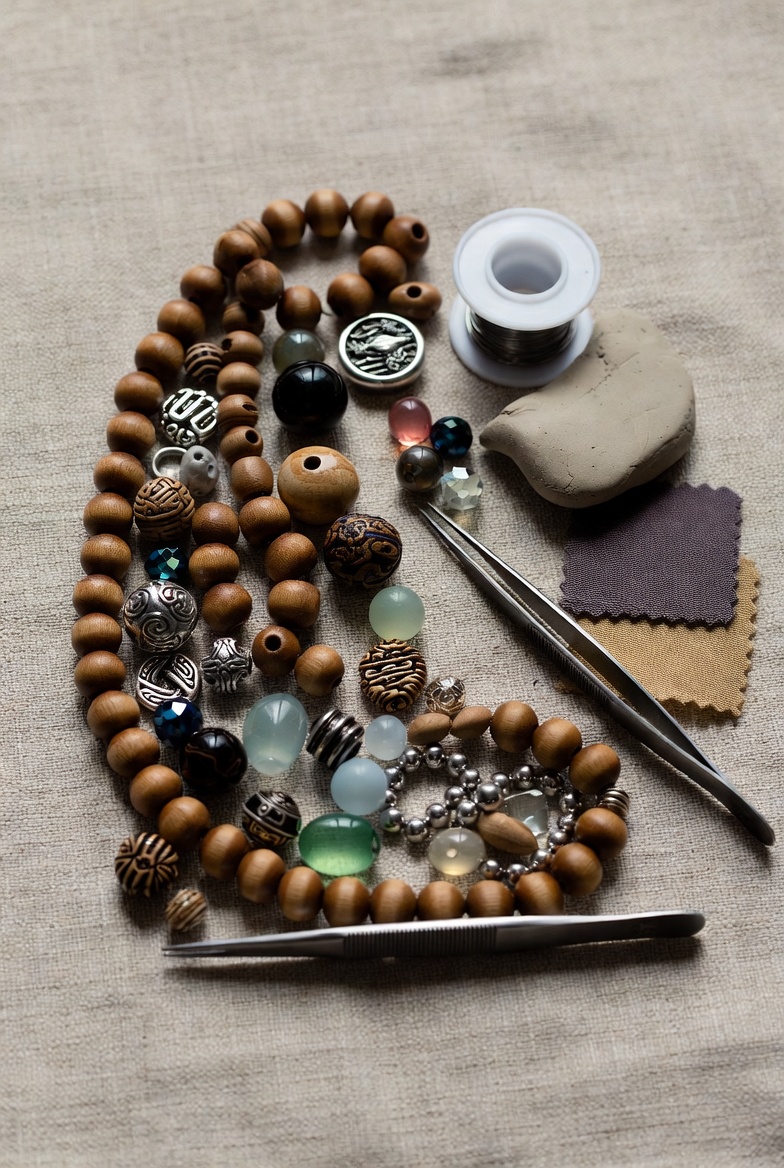
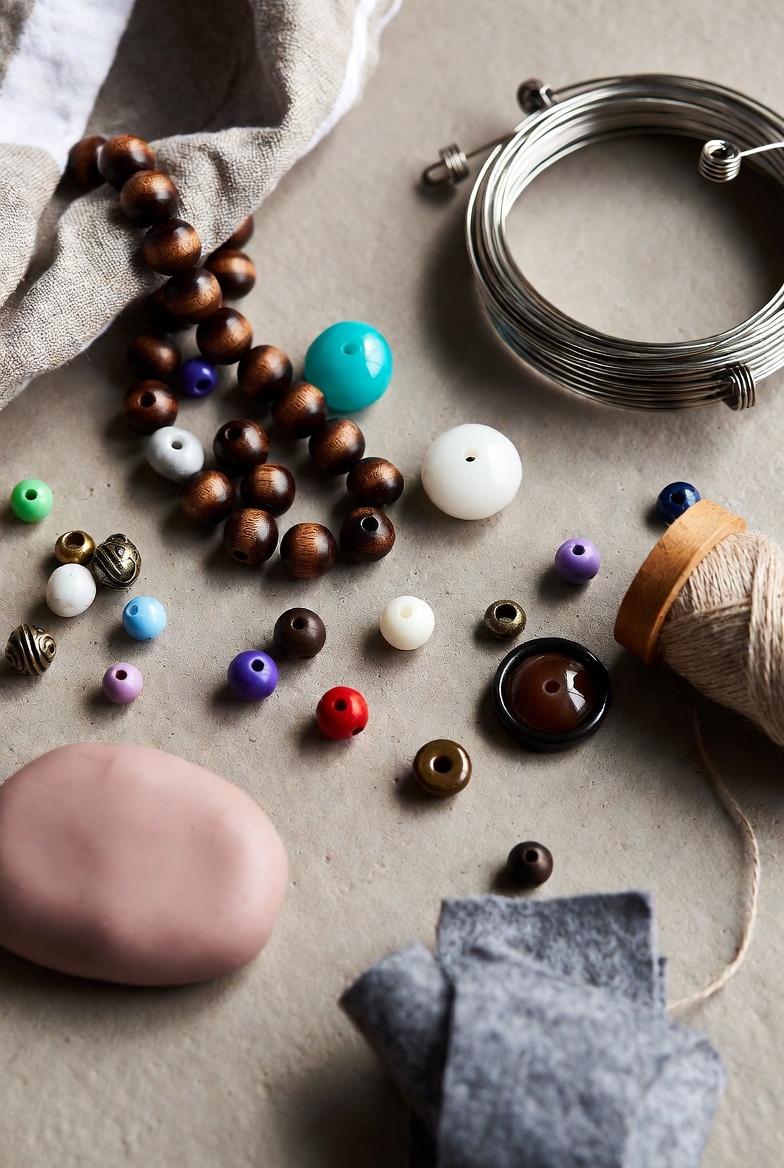
5- Beads: Use medium-sized glass, plastic, or ceramic beads colored in different hues, excluding very small beads initially to facilitate handling.
lass=”yoast-text-mark” />>6- Wire: Soft beading wire, such as 0.015-0.018 inches, or stretch cord, for making bracelets; jewelry wire, 20-24 gauge, for stringing
7- Findings: Crimp beads, jump rings, clasps (such as lobster or toggle),
headpins/eyelines to connect. Other: Super glue for knotty problems, Ruler or measuring tape for measurements, and Bead organizer or design board for design. These can be found at craft stores or online at suppliers like Beadaholique or Etsy; they’re budget-friendly and will provide what you’re looking for to get started: soft-wire and medium beads, as you mentioned.
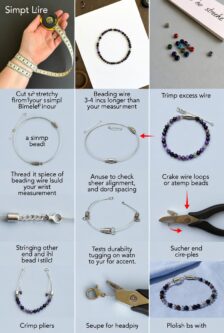
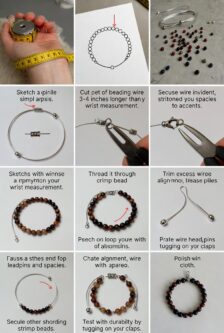
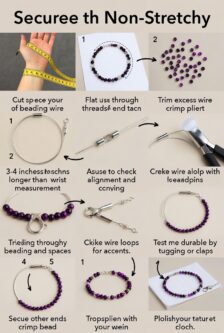
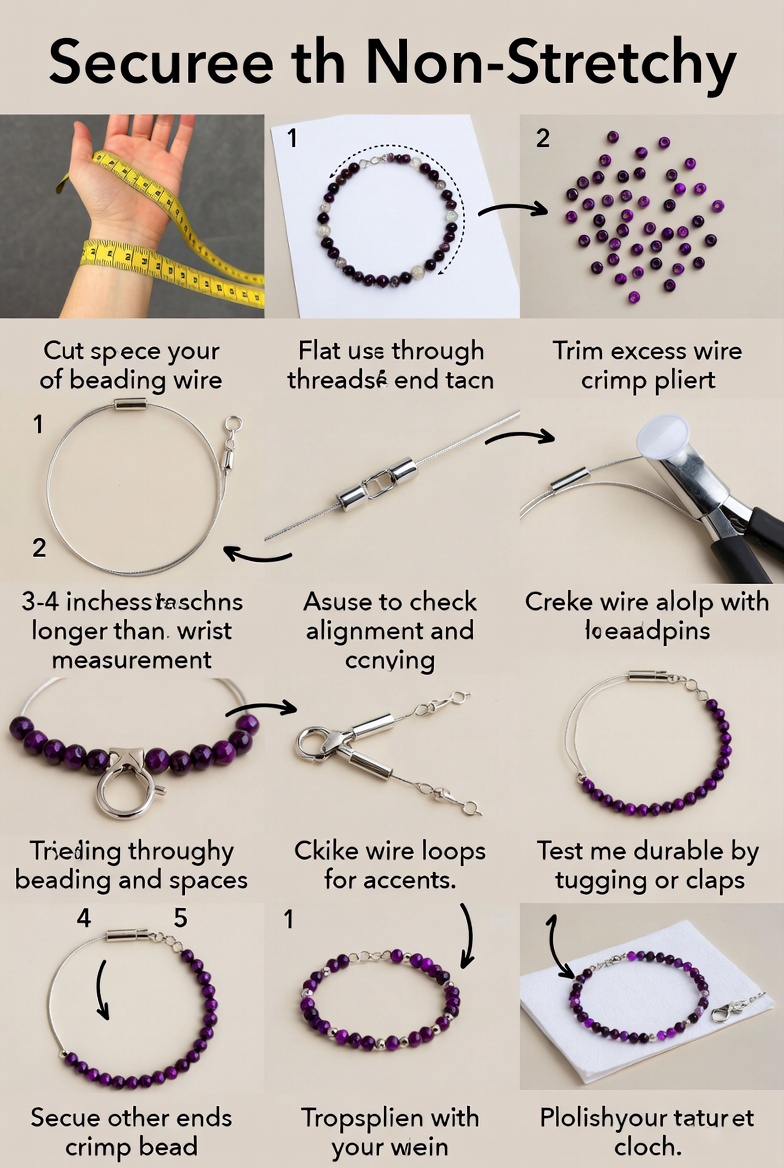
Step-by-Step Guide: Making a Simple Beaded Bracelet with Wire
This project is for stringing beading wire and crimp beads together with a crimp tool to make a strong and non-stretchy bangle.
This project is a fantastic way to get started with stringing and finishing techniques.
Time: 20 – 30
-
-
- **Plan Your Design:** You can measure the size of your wrist using a tape measure. There would be an allowance of 1-2 inches when you design the pattern. You simply have to sketch a design on the piece of paper that would involve the beading patterns alternating between colors or sizes. Beads would also be laid out on a flat surface.
</o
-
l>
- **Prepare the Wire:** Take a length of beading wire, about 3 to 4 inches longer than your actual wrist size (say, 10
inches for a 7-inch wrist). Pass one end of the beading wire through a crimp bead, then a jump ring or direct
- ly to one side of the clasp. Now, turn your beading wire back through the crimp bead, creating a small loop.
- **Secure the Crimp:** Use your crimp pliers or flat nose pliers to press the crimp bead flat against the wire. This will hold your clasp in place. Cut your excess piece of wire with your wire cutters very close to the crimp, but leave enough to tuck under your first bead.
- **String the Beads:** Begin to string your beads, working according to your pattern. Often, you will need to stop and check your spacing, if you want equal space between your beads.
Wire Wrap Accents: If your design includes wire wrapping, you will need to form some loops.
How to form a loop: Place a bead on a head pin, and bend the wire at a 90-degree angle above your bead, forming a loop.
Use your round nose pliers to form this loop.
Wind your excess wire around your bead for support.
Attach your loop to your body of work by wiring it to your necklace or between your stemmed flowers.</p>
- **Finish the other end:** Once you have all the beads threaded, insert the wire through another crimp bead, then through the other part of
the clasp or the jump ring. Loop back through the crimp bead and some beads to add extra strength. Crimp down well and cut off the excess wire.
- **Final Strokes & Check:** Gently tug on the clasps for strength testing. If required, apply super glue to the crimps/knots for added strength. Polish with a cloth if there are metal parts involved. And it is done, so go ahead, wear it, or gift it away! “This technique highlights clean loops and equal spacing to give your polish,


Tips for Beginners
– Keep it small: Start with just one form of jewelry, such as bracelets, and gain confidence in those before expanding.
– Practice techniques: One must know how to effectively manipulate basic skills like wire loops and crimps on inexpensive material before practicing on beads that could potentially be ruined if a mistake is made
– Practice patience: Assemble components slowly; otherwise, you may end up with warped pieces.
– Source thoughtfully: Your material for beads should pass through bead holes, using a bead reamer if the holes are too small.
– Experiment safely. Mix and match color and texture. Keep designs simple. Turn old jewelry into interesting design features. – Learning from Resources: One should take advantage of YouTube series to learn practical examples and leverage resources such as Reddit to learn from experts regarding what tools to use and how to resolve issues. With time, these steps will be second nature, and jewelry-making will be a soothing and pleasurable creative pursuit. Do you happen to want to make a particular kind of jewelry (say, earrings), or use a specific material set?